API Gatewayへの入力値にLambdaからアクセスする
Amazon API GatewayとAWS Lambdaを組み合わせて利用しているときに、リクエストヘッダやURLクエリパラメータなどの入力値にLambdaのコードからアクセスできるようにする方法について説明します。
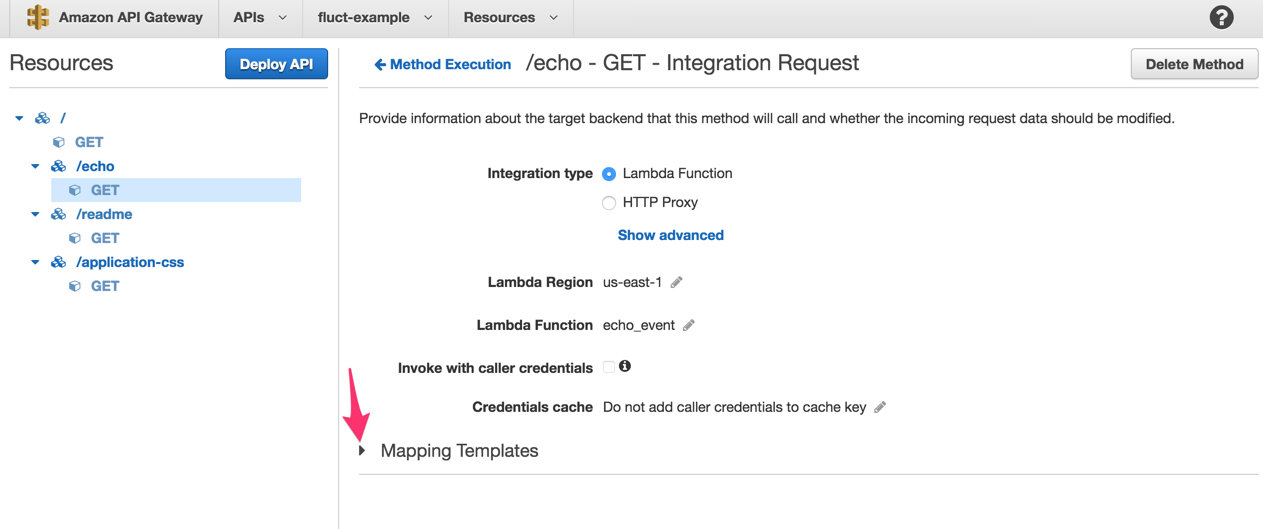
Integration Requestを選ぶ

Mapping Templatesを選ぶ
テンプレートを作成する
application/json用のテンプレートを作成します。

テンプレートを編集する
内容は以下の通りです。執筆時点で API Gatewayのドキュメント で説明されている全ての値を参照できるようにしてみました。このテンプレートはVTLという言語で記述することになっているので、詳しく知りたい人は ユーザガイド を見ると良いです。
{
  "accountId": "$context.identity.accountId",
  "apiId": "$context.apiId",
  "apiKey": "$context.identity.apiKey",
  "caller": "$context.identity.caller",
  "headers": {
#foreach( $key in $input.params().header.keySet() )
    "$key": "$input.params().header.get($key)"#if( $foreach.hasNext ),#end
#end
  },
  "httpMethod": "$context.httpMethod",
  "path": "$context.resourcePath",
  "pathParameters": {
#foreach( $key in $input.params().path.keySet() )
    "$key": "$input.params().path.get($key)"#if( $foreach.hasNext ),#end
#end
  },
  "queryParameters": {
#foreach( $key in $input.params().querystring.keySet() )
    "$key": "$input.params().querystring.get($key)"#if( $foreach.hasNext ),#end
#end
  },
  "requestId": "$context.requestId",
  "requestParameters": $input.json('$'),
  "resourceId": "$context.resourceId",
  "sourceIp": "$context.identity.sourceIp",
  "stage": "$context.stage",
  "user": "$context.identity.user",
  "userAgent": "$context.identity.userAgent",
  "userArn": "$context.identity.userArn"
}
おわり
以上の設定を反映させると、Lambdaのeventオブジェクトとしてこれらの値が渡されるようになります。
exports.handler = function (event, context) {
  context.succeed(event);
};